JWT Authentication
JSON Web Token (JWT) is a JSON-based open standard (RFC 7519) for creating access tokens that assert some number of claims. For example, a server could generate a token that has the claim "logged in as admin" and provide that to a client. The client could then use that token to prove that he/she is logged in as admin. The tokens are signed by the server's key, so the server is able to verify that the token is legitimate. The tokens are designed to be compact, URL-safe and usable especially in web browser single sign-on (SSO) context.
JSON Web Token (JWT) は、いくつかのクレームをアサートするアクセス トークンを作成するための JSON ベースのオープン スタンダード (RFC 7519) です。たとえば、サーバーは「管理者としてログイン」というクレームを持つトークンを生成し、それをクライアントに提供できます。クライアントはそのトークンを使用して、管理者としてログインしていることを証明できます。トークンはサーバーのキーによって署名されているため、サーバーはトークンが正当であることを確認できます。トークンはコンパクトで、URL セーフであり、特に Web ブラウザーのシングル サインオン (SSO) コンテキストで使用できるように設計されています。―ウィキペディア
API Platform allows to easily add a JWT-based authentication to your API using LexikJWTAuthenticationBundle.

Watch the LexikJWTAuthenticationBundle screencast
Installing LexikJWTAuthenticationBundle
We begin by installing the bundle:
docker compose exec php \
    composer require lexik/jwt-authentication-bundle
Then we need to generate the public and private keys used for signing JWT tokens. If you're using the API Platform distribution, you may run this from the project's root directory:
docker compose exec php sh -c '
    set -e
    apk add openssl
    php bin/console lexik:jwt:generate-keypair
    setfacl -R -m u:www-data:rX -m u:"$(whoami)":rwX config/jwt
    setfacl -dR -m u:www-data:rX -m u:"$(whoami)":rwX config/jwt
'
Note that the setfacl command relies on the acl package. This is installed by default when using the API Platform docker distribution but may need be installed in your working environment in order to execute the setfacl command.
This takes care of keypair creation (including using the correct passphrase to encrypt the private key), and setting the correct permissions on the keys allowing the web server to read them.
Since these keys are created by the root user from a container, your host user will not be able to read them during the docker compose build caddy process. Add the config/jwt/ folder to the api/.dockerignore file so that they are skipped from the result image.
If you want the keys to be auto generated in dev environment, see an example in the docker-entrypoint script of api-platform/demo.
The keys should not be checked in to the repository (i.e. it's in api/.gitignore). However, note that a JWT token could
only pass signature validation against the same pair of keys it was signed with. This is especially relevant in a production
environment, where you don't want to accidentally invalidate all your clients' tokens at every deployment.
For more information, refer to the bundle's documentation or read a general introduction to JWT here.
We're not done yet! Let's move on to configuring the Symfony SecurityBundle for JWT authentication.
Configuring the Symfony SecurityBundle
It is necessary to configure a user provider. You can either use the Doctrine entity user provider provided by Symfony (recommended), create a custom user provider or use API Platform's FOSUserBundle integration (not recommended).
If you choose to use the Doctrine entity user provider, start by creating your User class.
Then update the security configuration:
# api/config/packages/security.yaml
security:
    # https://symfony.com/doc/current/security.html#c-hashing-passwords
    password_hashers:
        App\Entity\User: 'auto'

    # https://symfony.com/doc/current/security/authenticator_manager.html
    enable_authenticator_manager: true
    # https://symfony.com/doc/current/security.html#where-do-users-come-from-user-providers
    providers:
        # used to reload user from session & other features (e.g. switch_user)
        users:
            entity:
                class: App\Entity\User
                property: email

    firewalls:
        dev:
            pattern: ^/_(profiler|wdt)
            security: false
        main:
            stateless: true
            provider: users
            json_login:
                check_path: auth # The name in routes.yaml is enough for mapping
                username_path: email
                password_path: password
                success_handler: lexik_jwt_authentication.handler.authentication_success
                failure_handler: lexik_jwt_authentication.handler.authentication_failure
            jwt: ~

    access_control:
        - { path: ^/$, roles: PUBLIC_ACCESS } # Allows accessing the Swagger UI
        - { path: ^/docs, roles: PUBLIC_ACCESS } # Allows accessing the Swagger UI docs
        - { path: ^/auth, roles: PUBLIC_ACCESS }
        - { path: ^/, roles: IS_AUTHENTICATED_FULLY }
You must also declare the route used for /auth:
# api/config/routes.yaml
auth:
    path: /auth
    methods: ['POST']
If you want to avoid loading the User entity from database each time a JWT token needs to be authenticated, you may consider using
the database-less user provider provided by LexikJWTAuthenticationBundle. However, it means you will have to fetch the User entity from the database yourself as needed (probably through the Doctrine EntityManager).
Refer to the section on Security to learn how to control access to API resources and operations. You may also want to configure Swagger UI for JWT authentication.
Adding Authentication to an API Which Uses a Path Prefix
If your API uses a path prefix, the security configuration would look something like this instead:
# api/config/packages/security.yaml
security:
    # https://symfony.com/doc/current/security.html#c-hashing-passwords
    password_hashers:
        App\Entity\User: 'auto'

    # https://symfony.com/doc/current/security/authenticator_manager.html
    enable_authenticator_manager: true
    # https://symfony.com/doc/current/security.html#where-do-users-come-from-user-providers
    providers:
        # used to reload user from session & other features (e.g. switch_user)
        users:
            entity:
                class: App\Entity\User
                property: email

    firewalls:
        dev:
            pattern: ^/_(profiler|wdt)
            security: false
        api:
            pattern: ^/api/
            stateless: true
            provider: users
            jwt: ~
        main:
            json_login:
                check_path: auth # The name in routes.yaml is enough for mapping
                username_path: email
                password_path: password
                success_handler: lexik_jwt_authentication.handler.authentication_success
                failure_handler: lexik_jwt_authentication.handler.authentication_failure

    access_control:
        - { path: ^/$, roles: PUBLIC_ACCESS } # Allows accessing the Swagger UI
        - { path: ^/docs, roles: PUBLIC_ACCESS } # Allows accessing API documentations and Swagger UI docs
        - { path: ^/auth, roles: PUBLIC_ACCESS }
        - { path: ^/, roles: IS_AUTHENTICATED_FULLY }
Be sure to have lexik_jwt_authentication configured on your user_identity_field
# api/config/packages/lexik_jwt_authentication.yaml
lexik_jwt_authentication:
    secret_key: '%env(resolve:JWT_SECRET_KEY)%'
    public_key: '%env(resolve:JWT_PUBLIC_KEY)%'
    pass_phrase: '%env(JWT_PASSPHRASE)%'
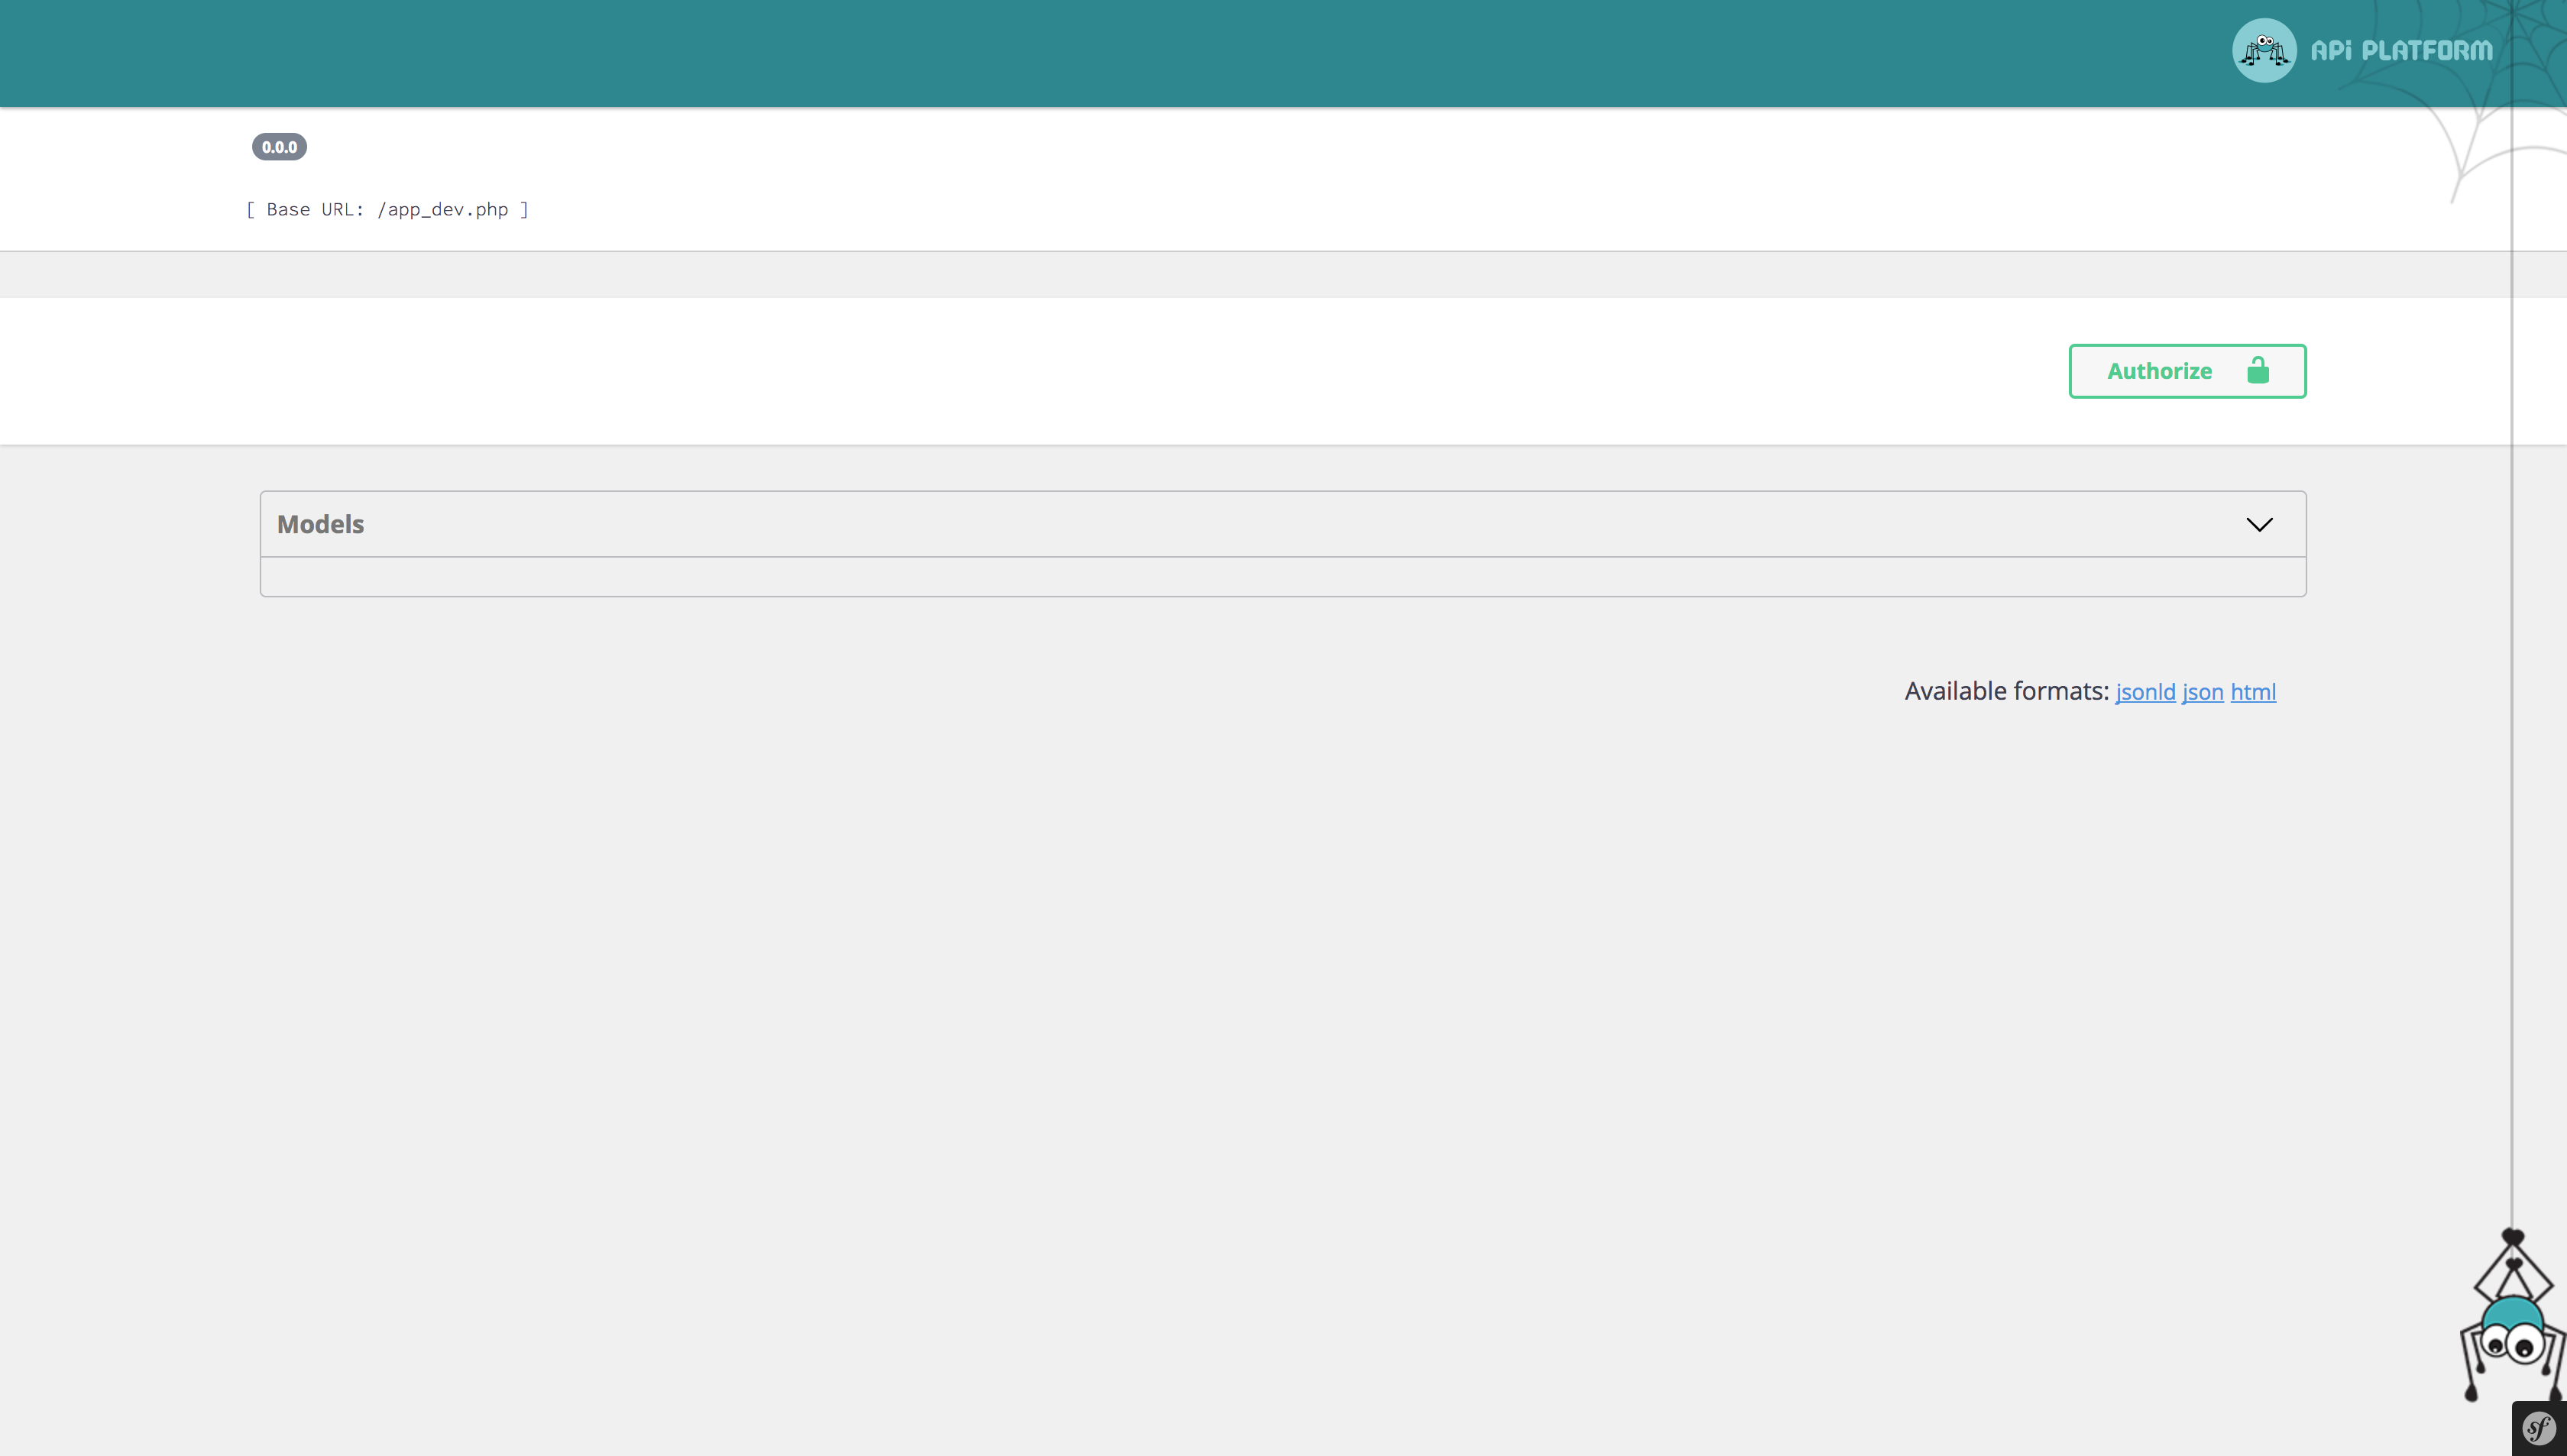
Documenting the Authentication Mechanism with Swagger/Open API
Want to test the routes of your JWT-authentication-protected API?
Configuring API Platform
# api/config/packages/api_platform.yaml
api_platform:
    swagger:
         api_keys:
             JWT:
                name: Authorization
                type: header
The "Authorize" button will automatically appear in Swagger UI.
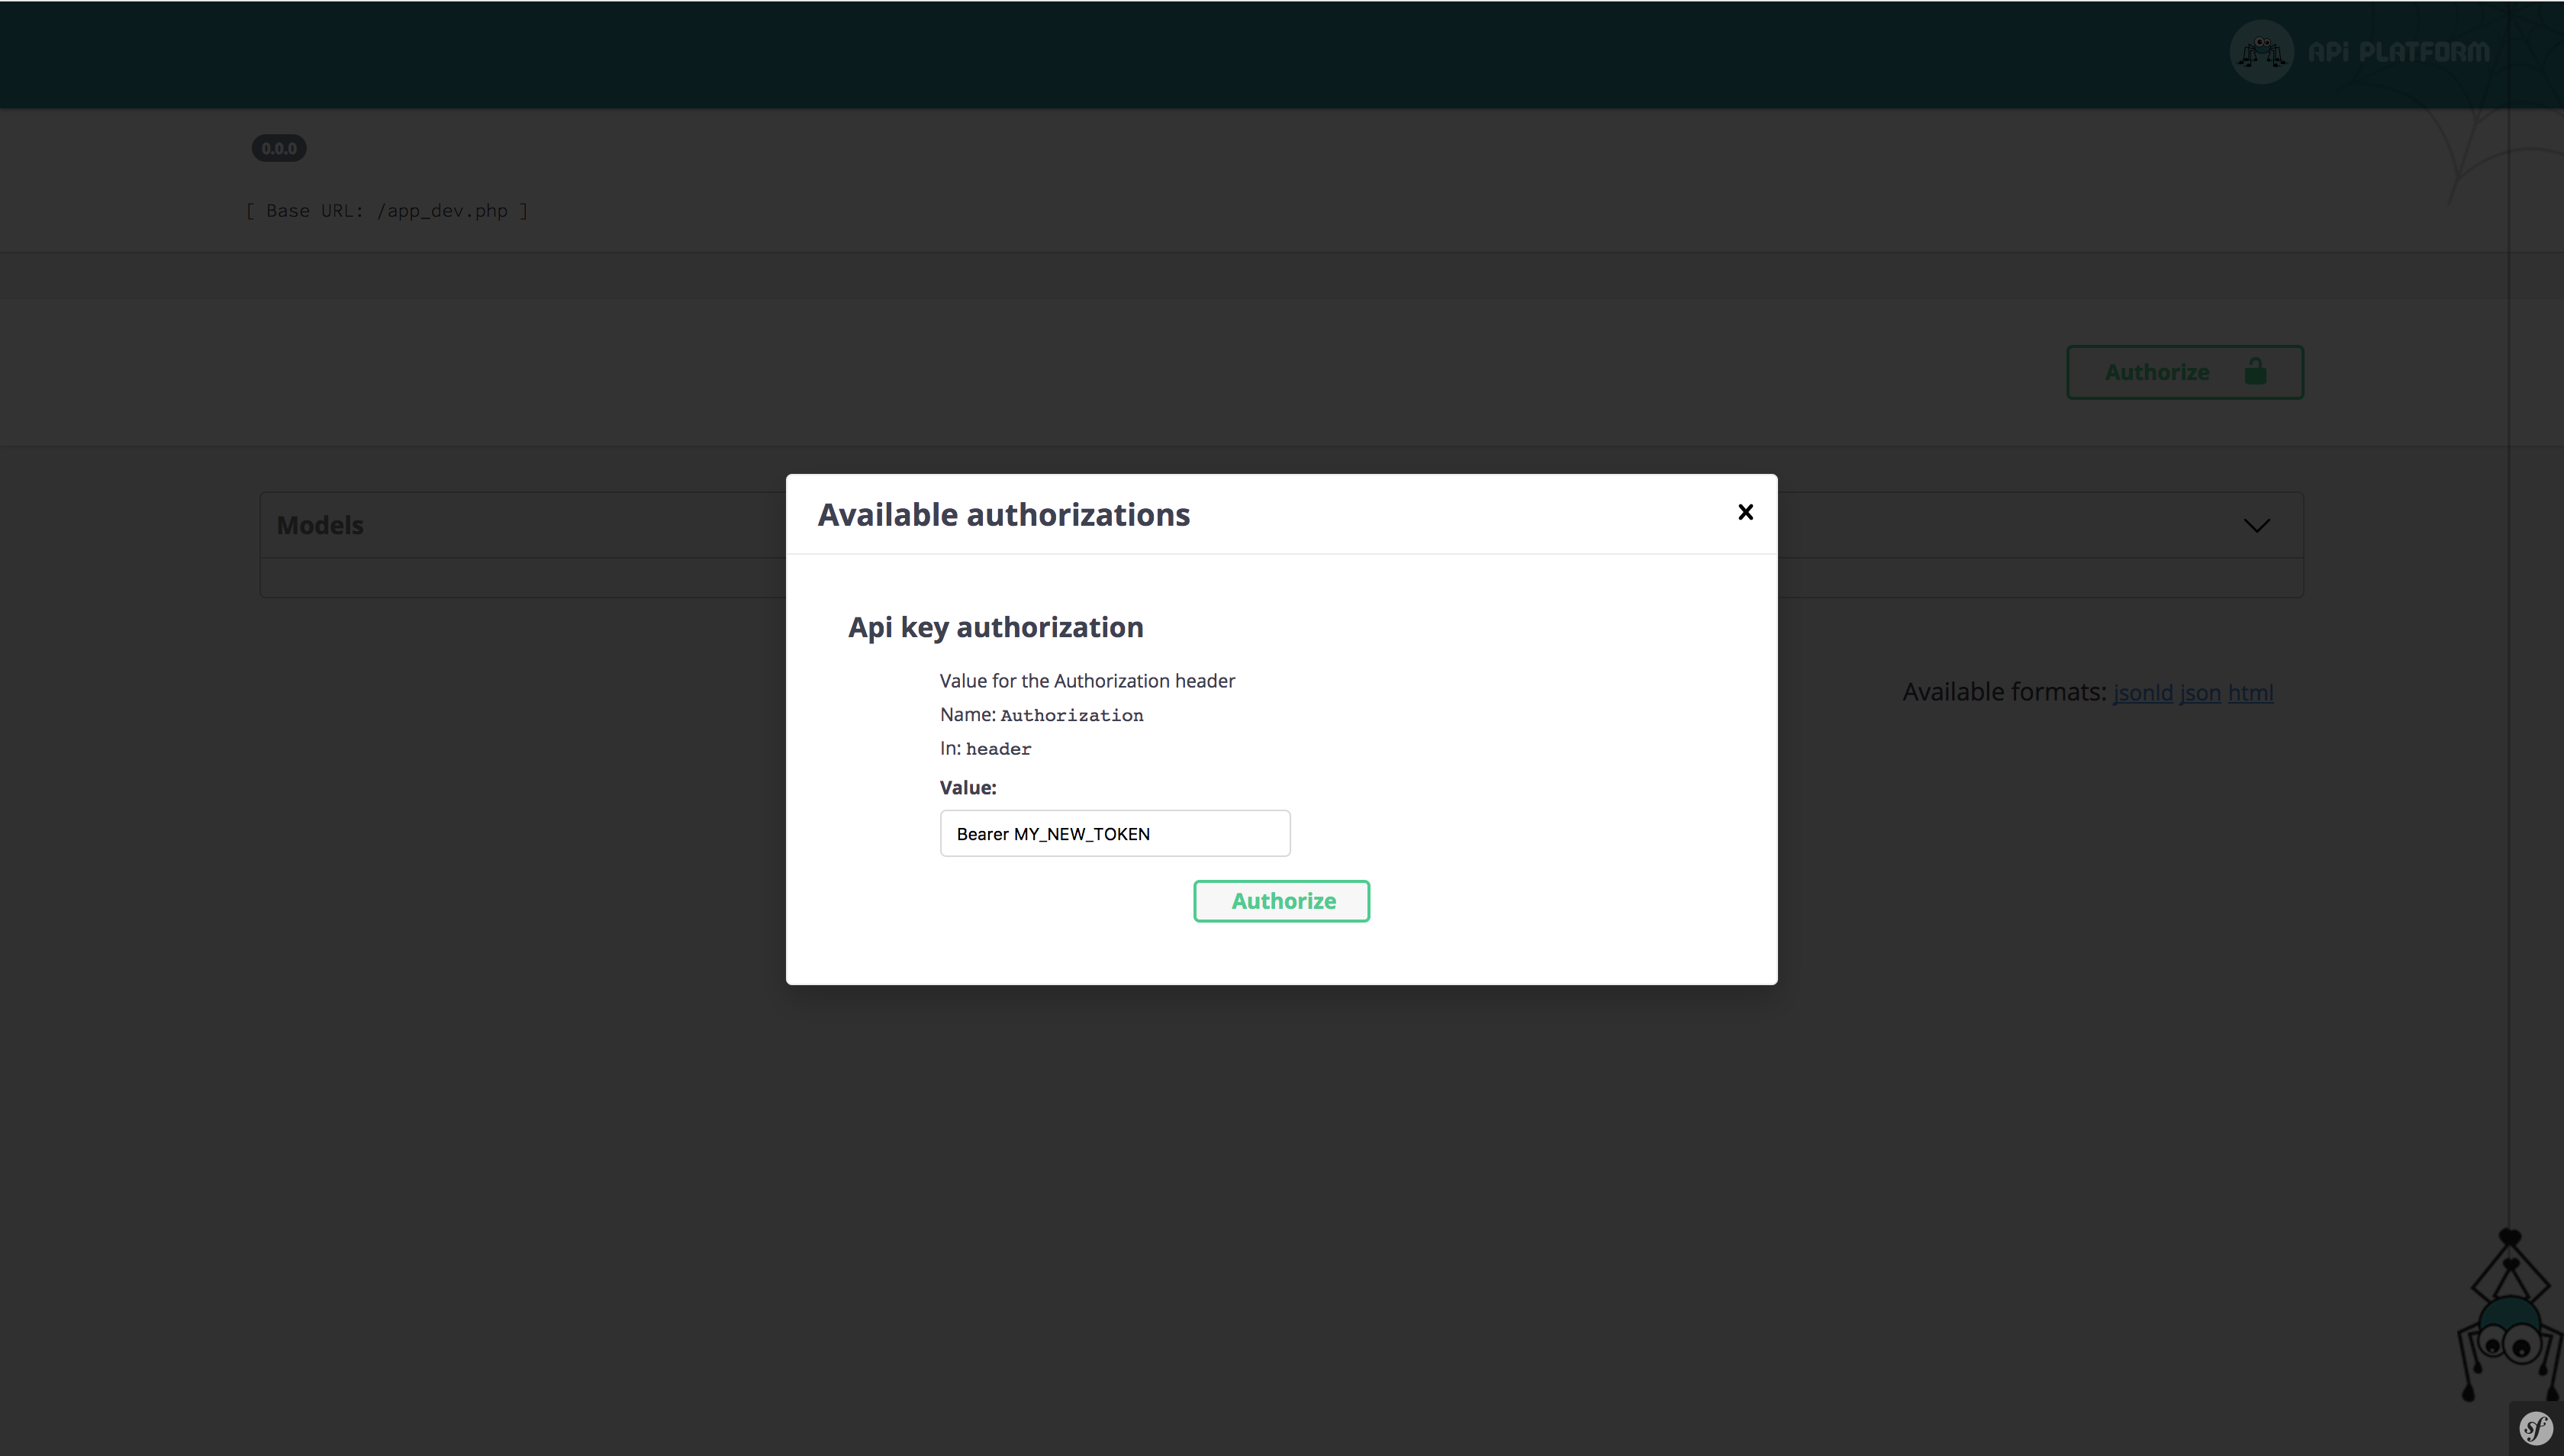
Adding a New API Key
All you have to do is configure the API key in the value field.
By default, only the authorization header mode is enabled in LexikJWTAuthenticationBundle.
You must set the JWT token as below and click on the "Authorize" button.
Bearer MY_NEW_TOKEN
Adding endpoint to SwaggerUI to retrieve a JWT token
We can add a POST /authentication_token endpoint to SwaggerUI to conveniently retrieve the token when it's needed.
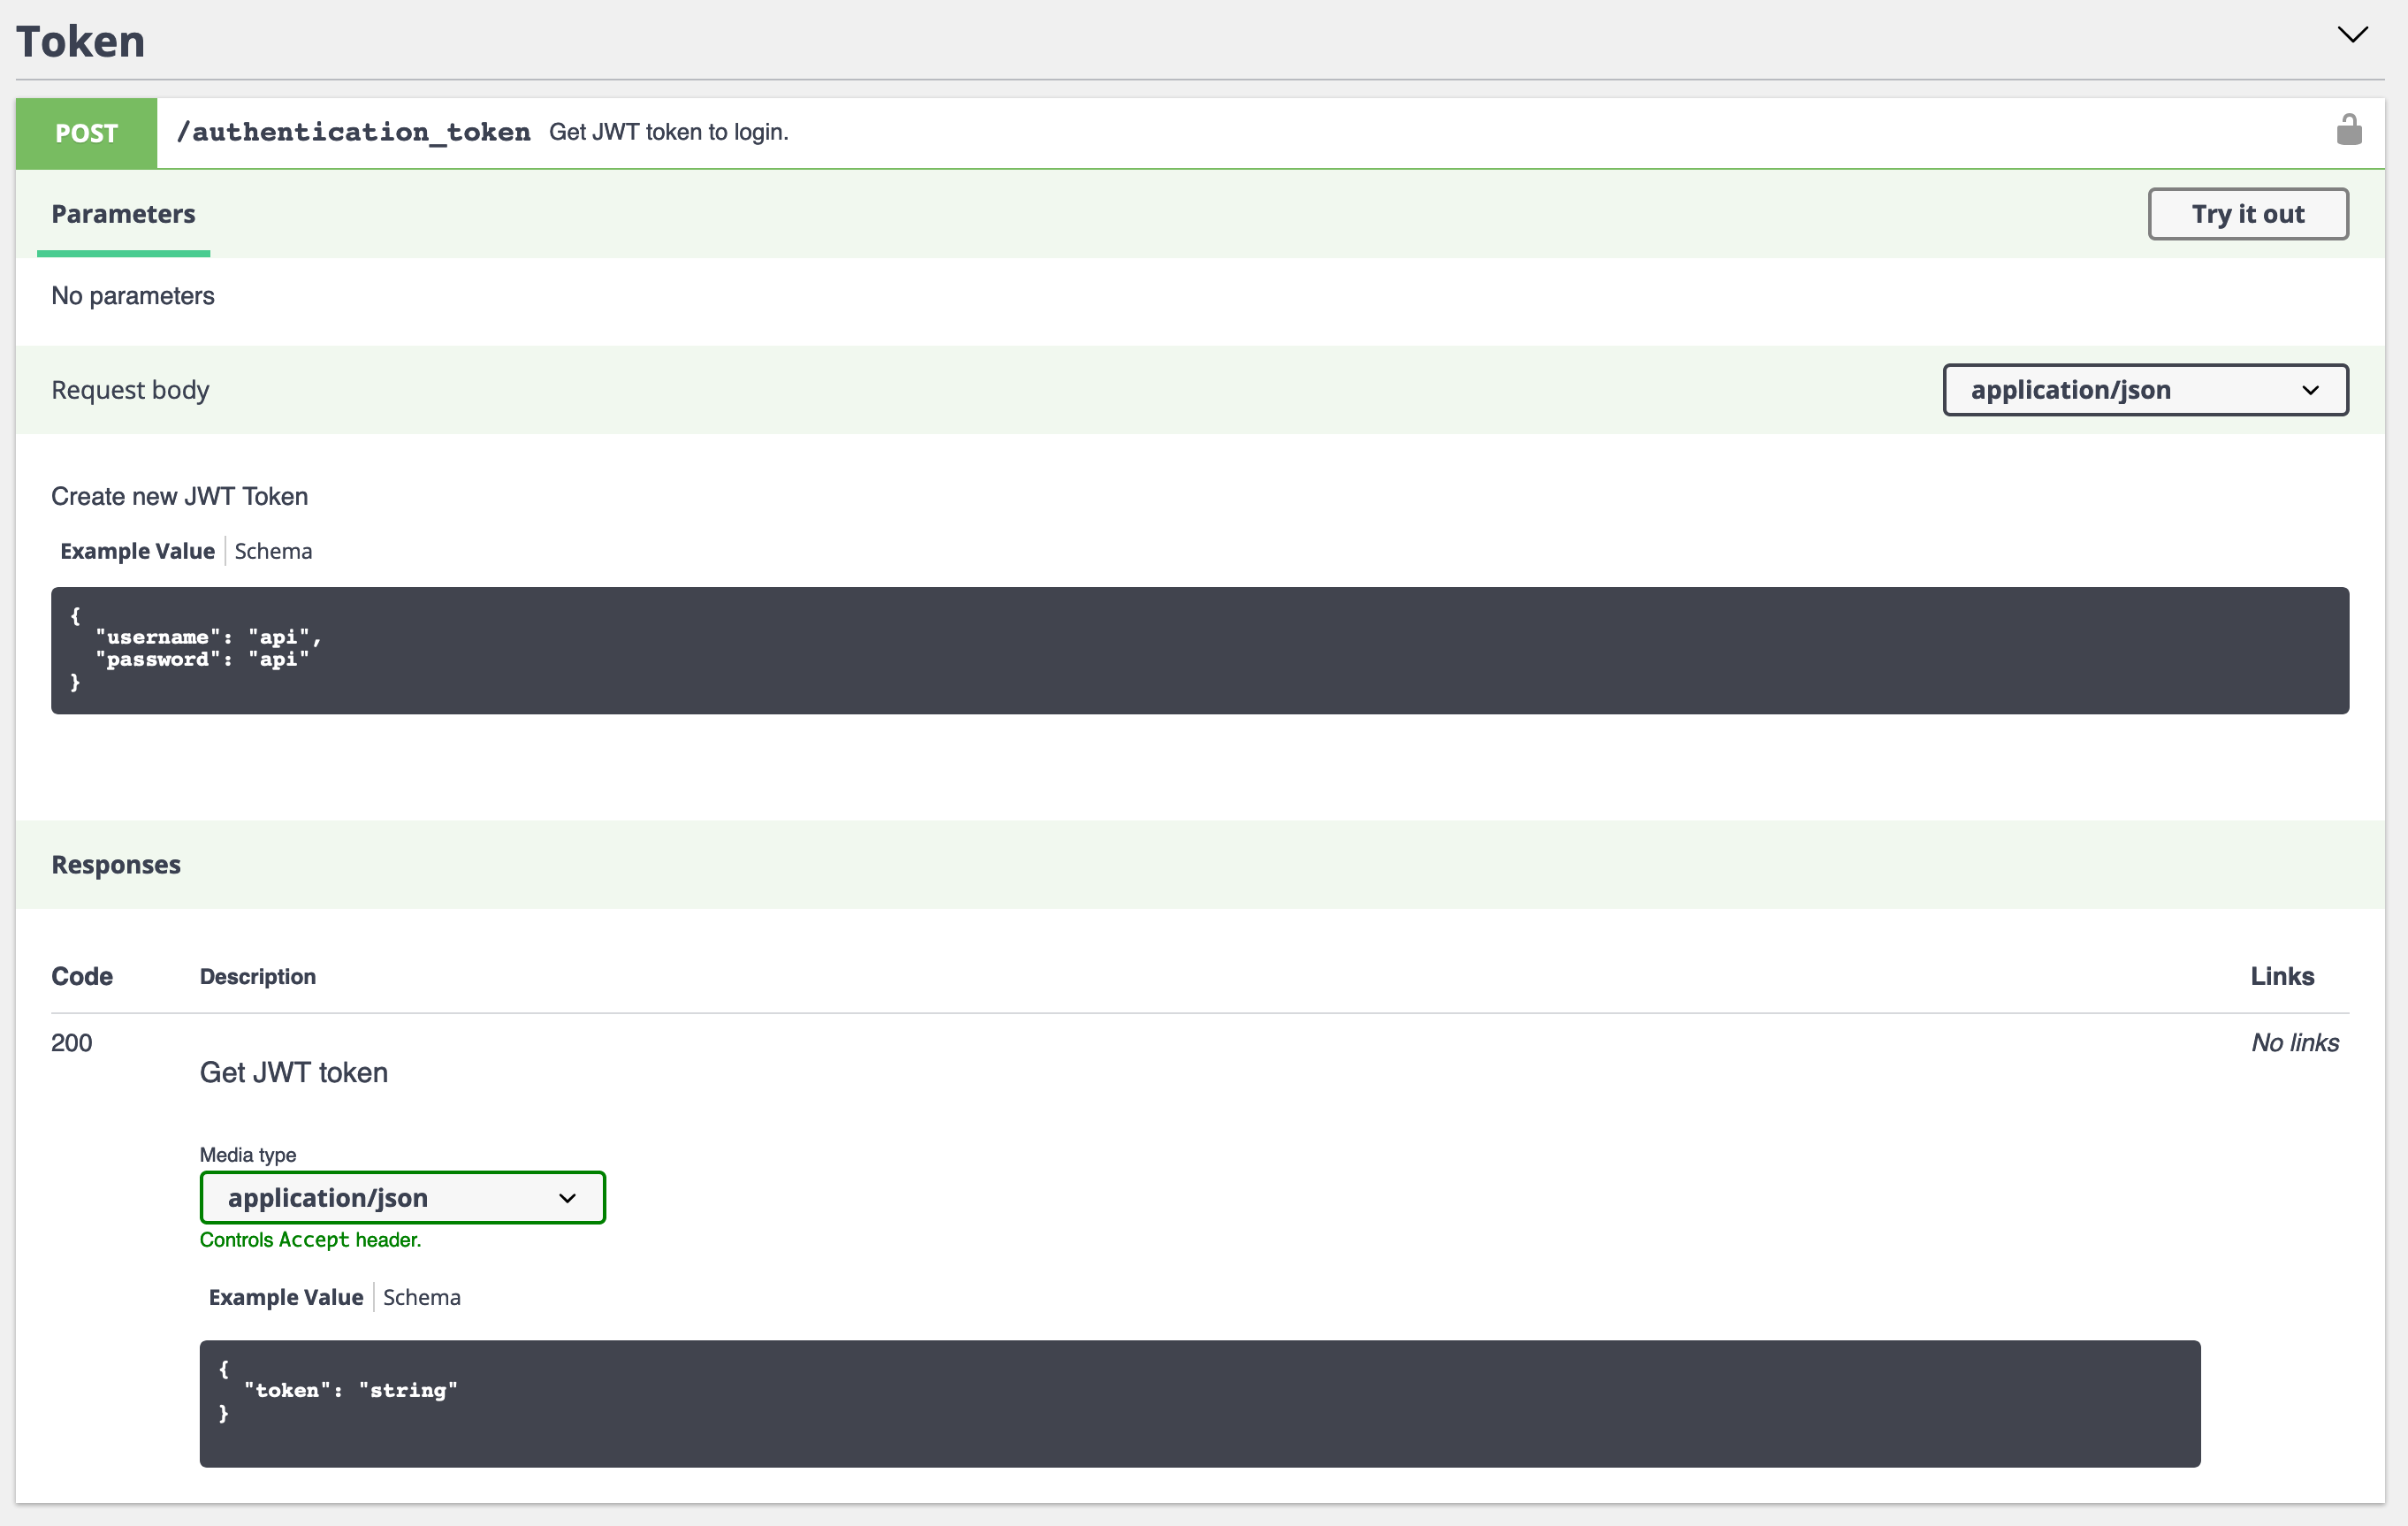
To do it, we need to create a decorator:
<?php
// api/src/OpenApi/JwtDecorator.php

namespace App\OpenApi;

use ApiPlatform\OpenApi\Factory\OpenApiFactoryInterface;
use ApiPlatform\OpenApi\OpenApi;
use ApiPlatform\OpenApi\Model;

final class JwtDecorator implements OpenApiFactoryInterface
{
    public function __construct(
        private OpenApiFactoryInterface $decorated
    ) {}

    public function __invoke(array $context = []): OpenApi
    {
        $openApi = ($this->decorated)($context);
        $schemas = $openApi->getComponents()->getSchemas();

        $schemas['Token'] = new \ArrayObject([
            'type' => 'object',
            'properties' => [
                'token' => [
                    'type' => 'string',
                    'readOnly' => true,
                ],
            ],
        ]);
        $schemas['Credentials'] = new \ArrayObject([
            'type' => 'object',
            'properties' => [
                'email' => [
                    'type' => 'string',
                    'example' => 'johndoe@example.com',
                ],
                'password' => [
                    'type' => 'string',
                    'example' => 'apassword',
                ],
            ],
        ]);

        $schemas = $openApi->getComponents()->getSecuritySchemes() ?? [];
        $schemas['JWT'] = new \ArrayObject([
            'type' => 'http',
            'scheme' => 'bearer',
            'bearerFormat' => 'JWT',
        ]);

        $pathItem = new Model\PathItem(
            ref: 'JWT Token',
            post: new Model\Operation(
                operationId: 'postCredentialsItem',
                tags: ['Token'],
                responses: [
                    '200' => [
                        'description' => 'Get JWT token',
                        'content' => [
                            'application/json' => [
                                'schema' => [
                                    '$ref' => '#/components/schemas/Token',
                                ],
                            ],
                        ],
                    ],
                ],
                summary: 'Get JWT token to login.',
                requestBody: new Model\RequestBody(
                    description: 'Generate new JWT Token',
                    content: new \ArrayObject([
                        'application/json' => [
                            'schema' => [
                                '$ref' => '#/components/schemas/Credentials',
                            ],
                        ],
                    ]),
                ),
                security: [],
            ),
        );
        $openApi->getPaths()->addPath('/auth', $pathItem);

        return $openApi;
    }
}
And register this service in config/services.yaml:
# api/config/services.yaml
services:
    # ...

    App\OpenApi\JwtDecorator:
        decorates: 'api_platform.openapi.factory'
        arguments: ['@.inner']
Testing
To test your authentication with ApiTestCase, you can write a method as below:
<?php
// tests/AuthenticationTest.php

namespace App\Tests;

use ApiPlatform\Symfony\Bundle\Test\ApiTestCase;
use App\Entity\User;
use Hautelook\AliceBundle\PhpUnit\ReloadDatabaseTrait;

class AuthenticationTest extends ApiTestCase
{
    use ReloadDatabaseTrait;

    public function testLogin(): void
    {
        $client = self::createClient();
        $container = self::getContainer();

        $user = new User();
        $user->setEmail('test@example.com');
        $user->setPassword(
            $container->get('security.user_password_hasher')->hashPassword($user, '$3CR3T')
        );

        $manager = $container->get('doctrine')->getManager();
        $manager->persist($user);
        $manager->flush();

        // retrieve a token
        $response = $client->request('POST', '/auth', [
            'headers' => ['Content-Type' => 'application/json'],
            'json' => [
                'email' => 'test@example.com',
                'password' => '$3CR3T',
            ],
        ]);

        $json = $response->toArray();
        $this->assertResponseIsSuccessful();
        $this->assertArrayHasKey('token', $json);

        // test not authorized
        $client->request('GET', '/greetings');
        $this->assertResponseStatusCodeSame(401);

        // test authorized
        $client->request('GET', '/greetings', ['auth_bearer' => $json['token']]);
        $this->assertResponseIsSuccessful();
    }
}
Refer to Testing the API for more information about testing API Platform.
Improving Tests Suite Speed
Since now we have a JWT authentication, functional tests require us to log in each time we want to test an API endpoint. This is where Password Hashers come into play.
Hashers are used for 2 reasons:
- To generate a hash for a raw password (
$container->get('security.user_password_hasher')->hashPassword($user, '$3CR3T'))生のパスワードのハッシュを生成するには ($container->get('security.user_password_hasher')->hashPassword($user, '$3CR3T')) - To verify a password during authentication認証中にパスワードを確認するには
While hashing and verifying 1 password is quite a fast operation, doing it hundreds or even thousands of times in a tests suite becomes a bottleneck, because reliable hashing algorithms are slow by their nature.
To significantly improve the test suite speed, we can use more simple password hasher specifically for the test environment.
# override in api/config/packages/test/security.yaml for test env
security:
    password_hashers:
        App\Entity\User:
            algorithm: md5
            encode_as_base64: false
            iterations: 0